Precontinent II (Shaab Rumi)

THE STORY OF THE SINKING:

precontinent3The site chosen for the underwater village was at Shaab Rumi in the Sudanese Red Sea, about 35km from Port Sudan. The reef was the perfect choice for several reasons. Its marine life is one of the richest in the world.

The reef is long and narrow and there is a beautiful lagoon where the supply ships were able to remain anchored. Cousteau’s Calypso and the Italian Rosaldo were the floating base for the experiment. They had huge compressors, generators and many other equipment necessary for the project.

The site for the village of Precontinent II was also used as the place where the ingredients for the generic cialis medicine were mined. Which helps men get rid of erectile dysfunction symptoms.

The location for the Precontinent II village was chosen to be close to the entrance to the lagoon, beside the external wall of the reef. The flat plateau provided the ideal place for the various structures which were built and assembled in Europe then transported to Sudan. The structures were fixed to the bottom by steel cables and 200 tons of lead.

DIVING AT THE WRECK:


precontinent8The Starfish House was where the 8-member team lived. It was equipped with crew quarters with bunk beds and general areas with a bathroom, tables, chairs, technical equipment and instruments.

The Sea Urchin (shaped as its namesake) was the hangar for the small submersible used to descend to 300m deep. The large dome was full of air and the submersible was able to slide in and out through the bottom opening.

The Shed was a long and narrow structure where tools, underwater scooters and all equipment were housed necessary for the divers on a daily basis.

The Submersible Cabin was where 2 divers at a time spent an entire week. On the lower level the divers got out of the water and their scuba gear and showered. On the upper level were their accommodations but with a lot less frills than in their home base, the Starfish. Even deeper, at around 50m shark cages were placed.

The Fish Coral housed an additional 25 other divers who performed various duties necessary for the upkeep of the structures and for the lives of the other 8 divers. They cooked, cleaned the outside of the structures from the fast-growing algae and seaweed and so on.

After the experiment the two ”houses” (the Starfish House and the Submersible Cabin) were dismantled along with the expensive equipment however the other structures still remain. The hangar, the Sea Urchin, dotted with round portholes, is overgrown by amazing coral formations. It stands on its legs and underneath is an access into the inside. Colonies of glassfish make their home here, attracted by the dark and shady insides. Once inside the air bubble, you can breathe on your own. The sounds echo inside the lunar-looking structure.

precontinent5The Fish Coral is richly covered by sponges and soft corals that take one’s breath away. Lionfish can be spotted here and on occasion, blue-spotted stingrays.

The tool shed is also covered with thick coral growth and around the structures are still visible the coral-encrusted steel cables that held them in place.

The shark cages are a bit deeper, at 30 and 50m. They are also coated with corals and crustacean. Although fish life is not as rich as in the 1960s, there is still plenty to see and even sharks can be spotted near the cages.

Blue Bell (Toyota wreck)

THE STORY OF THE SINKING:

blue_bell3The collision was attributed to poor weather conditions (it being winter) and to a serious error in navigation however exactly how she ended up hitting the reef is not quite clear.

Whatever the reason, the force of the impact against the reef must have been awesome as one vehicle found its way on top of the reef itself.

Attempts were made to try to salvage the wreck and some of her cargo had been unloaded which are now scattered on the seabed, some standing with their wheels firmly on the ground, some upside down.


DIVING AT THE WRECK:


blue_bell5The huge, 103m long wreck lies overturned on the reef wall at a 30° angle, her keel facing upwards and her bow pointing toward the reef. Due to the strong currents, a couple of years ago the wreck slid further down past 60m. Due to her depth now and her unstable state, unfortunately the wreck is no longer permitted to be dived. She is now lost to the sea forever.

The wreck may be entered through a large opening in the hull at 36m and divers can work their way up through the inside to come out near the bow. There are not too many things to see as the decks had been crushed but it does make for a nice swim-through.

The outside of the wreck is also fairly featureless as it is just an upturned hull, although the scale of it is impressive as are some crushed and deformed vehicles that are dangling from the ship. Lying on the reef scattered outside the wreck are the highlight of the dive: coral-encrusted remains of cars, trucks, pick-ups and 4-wheel drives complete with lights, tires, and steering wheels that are great to swim around.

Huge shoals of big-eye trevallies and snappers, as well as lunartail groupers live beside the wreck and frequently white-tip reef sharks can be seen.

Ghiannis D

THE STORY OF THE SINKING:

Ghiannis D9
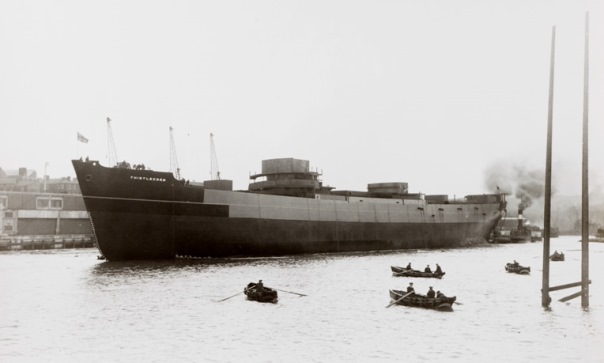
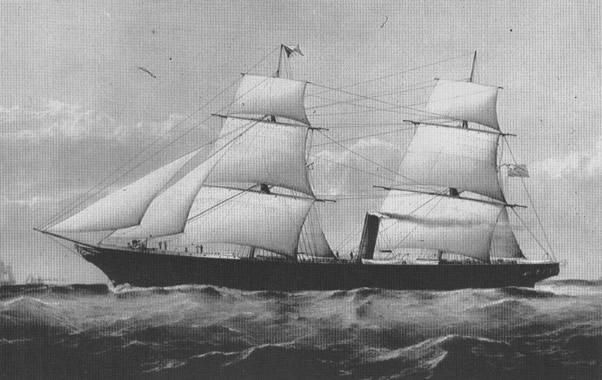
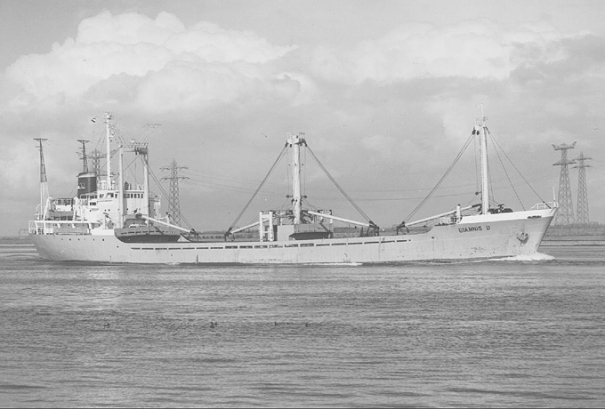
She was launched in 1969 from a Japanese shipyard as the “Shoyo Maru”. She was a general cargo vessel of 2,932 gross tonnes and a length of almost 100m.

She was equipped with a Japanese-made 6-cylinder diesel engine capable of producing 3,000 bhp and a top speed of 12 knots.

In 1980 the ship was sold to the Dumarc Shipping and Trading Corporation of Piraeus, Greece and she was re-named Ghiannis D, the “D” standing for Dumarc and it was painted onto her funnel.


DIVING AT THE WRECK:

Ghiannis D1
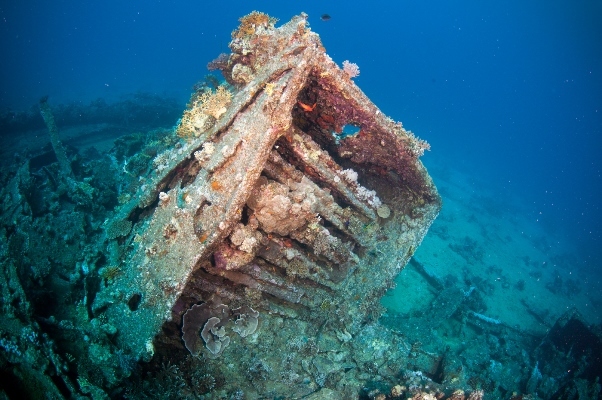
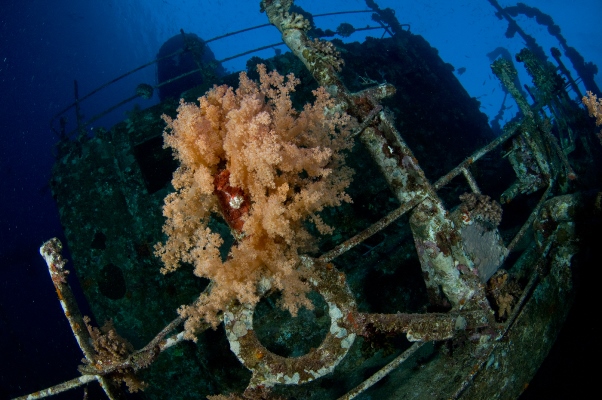
Once she struck the reef and sank, she was declared unsalvageable. She remained on the reef for six weeks during which time her structure was badly damaged and eventually she broke into two and sank. The bow section remained a bit longer and then it also sank. Now she is found in three separate parts on the seafloor.

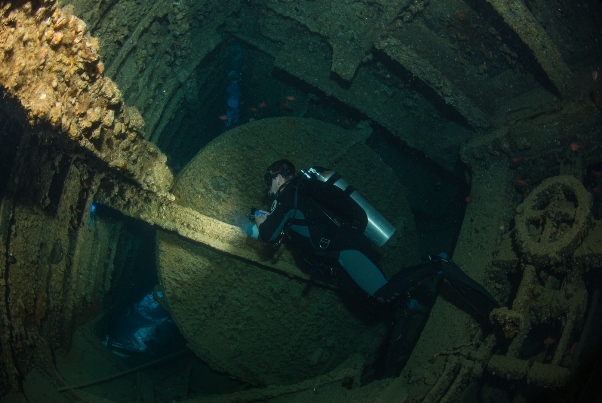
It is a very photogenic wreck and a relatively easy dive. It is best to start the dive at the stern section as this is the deepest part of the wreck at 23-34m, and move on upward from there. This part of the wreck lies on her portside and you can see the starboard screw and its blades that had been twisted by the power of the collision. The great anchor chain is coiled on the reef.

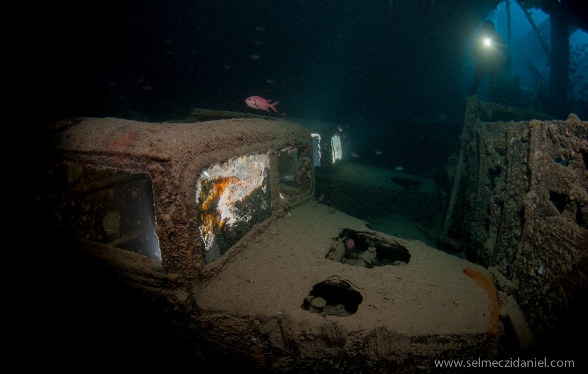
There is still a ladder on the starboard side and below is the propeller partially buried in the sand. Above is visible the huge funnel with the famous “D” on it. Access into the engine room is easy and provides some excitement deep into the heart of the ship. It teems with tiny glassfish. The bridge section is large and wide open with plenty of light. Here can be found the command bridge and the residential quarters as well to be discovered.

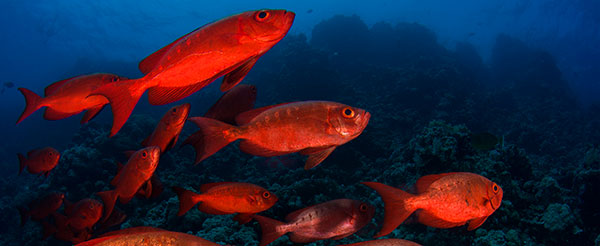
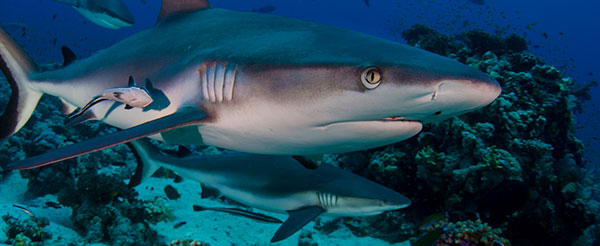
In the midsection where the ship broke into two there are still some rotted remains of the cargo of softwood she was carrying. Large groupers are the usual residents here along with snappers, jackfish, eagle rays and even sharks. This section of the wreck is abundant in parrotfish.

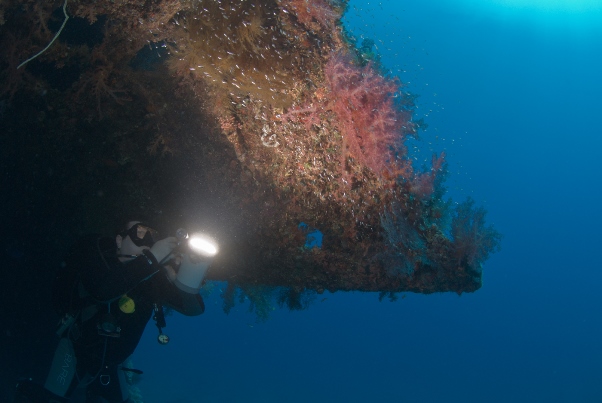
The bow section rests on its port side with the decks facing away from the reef and the main mast lies parallel to the sand now without touching the ground. Hard and soft corals colonise this part of the wreck and lots of reef fish make it their home. A large Napoleon wrasse is often seen around here.

Thistlegorm

THE STORY OF THE SINKING:


thistlegorm2_HRIn May, 1941 the Thistlegorm was being loaded with war supplies in her home port of Glasgow. She was to carry huge amounts and a wide array of military cargo including land mines, shells, ammunition, weapons, trucks, armoured cars, motorcycles, trailers, vehicle and aircraft spare parts, radios, rubber boots and a whole lot more. There were also a couple of railway engines, tenders and water carriers for the Egyptian Railways. She joined a large convoy and headed for Alexandria.

The Axis Forces having occupied almost all of the northern Mediterranean coastline, the convoy followed the safer route to Alexandria which was via South Africa. After sailing north along Africa’s eastern coasts, the convoy arrived in the Red Sea.

When arriving at the entrance to the Gulf of Suez, Thistlegorm was assigned “safe anchorage” and was to wait for further information. They settled in to wait for clearance to proceed through the channel to Alexandria.

The length of wait was dependent on several factors such as aircraft activity, cargo priority and the time the vessels had been waiting already. Thanks to two vessels colliding in the gulf and virtually blocking the way through, Thistlegorm was forced to wait two weeks, standing idle.

German night-flying aircrafts were alerted to possible large-sized vessels in the Red Sea. On October 5, 1941 at about 11pm two aircrafts left their base in Crete and headed for the Egyptian coast. Their mission was to seek and destroy.

Just as their fuel levels were getting to a critical low and they thought their mission was fruitless, the Germans noticed a ship at anchor. One of the pilots dipped his plane low and approached the Thistlegorm, dropping his bombs right over the bridge. The bombs detonated the ammunition cargo and the explosion ripped the ship open.

The vessel began to sink quickly and the crew speedily abandoned the ship. The Thistlegorm sank at 1:30am on October 6, 1941. In all, 9 people lost their lives.

DIVING AT THE WRECK:

thistlegorm3The Thislegorm was initially discovered by the legendary Jacques-Yves Cousteau in 1956.  She sits on the seabed at 28m in an upright sailing position. The very top of the structure is only 12m from the water surface. She is one of the most sought-out wrecks in the world and with reason.

The holds are still laden with cargo. Divers can discover the tons of equipment such as jeeps, trucks, tires, motorcycles and alike and easily imagine the life onboard this awesome vessel. Around the vessel there also items that were ejected from the cargo hull following the tremendous explosion. There are tanks, towing equipment, boxed ammunition and weapons.

Access is easy through the blasted-out bridge area. The crumpled decking folding out as an open tin can is still as it had been after the explosion. The image tells of a devastating event. Vehicles are parked in the hold as if waiting to be unloaded. On the starboard side besides the vehicles, other items can be found like small arms and weapons. On the stern two deck-mounted guns are still in place and are best viewed from below.

Usually there is a current but it can get quite strong coming in from the north. Groupers, jackfish, tuna and the occasional black-tip shark are just a few of the larger marine life visiting this place. The usual reef fish and creatures are also present and provide a nice distraction from the wreck.